Nonplanar Slicing
https://github.com/Zip-o-mat/Slic3r/tree/nonplanar
About this technique
Additive manufacturing processes are inherently subject to discretization effects. For most technologies, stair-stepping artifacts impair the surface quality of 3D printed objects, especially when the surface slope is close to horizontal.
In this video we propose a novel Fused Deposition Modeling (FDM) slicing approach that combines nonplanar and planar layers, increasing printing quality and resulting in smoother, stronger object surfaces. Our slicing algorithm automatically detects which parts of the object should be printed with nonplanar layers and uses a geometric model of the printhead and extruder to generate collision-free toolpaths.
Our open source implementation is based on the popular Slic3r tool and can be used on all common three-axis 3D printers. We present typical printing results and compare surface quality as well as slicing and printing times with traditional and adaptive planar slicing.
Windows
As there is no build for Windows of this application, I have to use a workaround if I want to use this software. Windows 10 includes an underlying “Windows Subsystem for Linux” that allows Windows 10 to run Linux software by translating Linux system calls to Windows system calls (see https://www.howtogeek.com/261575/how-to-run-graphical-linux-desktop-applications-from-windows-10s-bash-shell/ for more information). I am following these steps:
First, you need to open Powershell as administrator and run
Enable-WindowsOptionalFeature -Online -FeatureName Microsoft-Windows-Subsystem-Linux
You will be prompted to restart. After restarting you have to download a Linux distribution; I picked Ubuntu 18.04 LTS. Once this has finished downloading and installing, you need to complete initialization of your new distro. For this you need to launch the distro (distribution package). The first time a newly installed distro runs, a Console window will open, and you’ll be asked to wait for the installation to complete. Then you will be prompted to create a new UNIX account (you will only be prompted for this password when you elevate a process using the command sudo).
I am also installing an X server (Xming is recommended on the howtogeek tutorial so I use that one) so I can use a GUI (Graphical User Interface) because this is not included in the Linux Subsystem for Windows.
Microsoft doesn’t want to spend any time working on graphical software, as this feature is intended for command-line developer tools. But the main technical reason that graphical applications aren’t supported is that they require an “X server” to provide that graphical interface. On a typical Linux desktop, that “X server” automatically appears when you boot your computer and it renders the entire desktop and the applications you use.
Before launching an application, you have to set the “DISPLAY” environment variable to point at the X server (otherwise it will not work).
To do this, run the following command in the Linux Bash environment:
export DISPLAY=:0
This setting only applies to your current Bash session. If you close the window, Bash will forget it. You’ll have to run this command each time you reopen Bash and want to run a graphical application.
From now I am following the instructions from the Github. Before I could run the first command, I had to update using sudo apt-get update because it was not able to locate any packages (probably because some settings were disabled before the update, see https://askubuntu.com/questions/378558/unable-to-locate-package-while-trying-to-install-packages-with-apt). Also, do not make the same mistake as me by trying to use Powershell to get the repository, because Ubuntu cannot locate it. Follow all of the steps using Bash.
- Note: copy/paste did not work for me but right clicking in Bash works as paste.
- Instead of starting the script with
perl slic3r.pl, useperl slic3r.pl --guito start with a GUI (after setting the DISPLAY). Then Xming should open Slic3r and you have to specify the firmware you are using and add some basic information about your 3d printer. If you get the following error after you did set your display, you have to make sure Xming is running (just look for the program and start it).
Unable to init server: Could not connect: Connection refused
13:56:51: Error: Unable to initialize GTK+, is DISPLAY set properly?
Failed to initialize wxWidgets at /home/v0ss3n/Slic3r/lib/Slic3r/GUI.pm line 7.
Compilation failed in require at /home/v0ss3n/Slic3r/lib/Slic3r/GUI.pm line 7.
BEGIN failed--compilation aborted at /home/v0ss3n/Slic3r/lib/Slic3r/GUI.pm line 7.
Compilation failed in require at (eval 82) line 1.
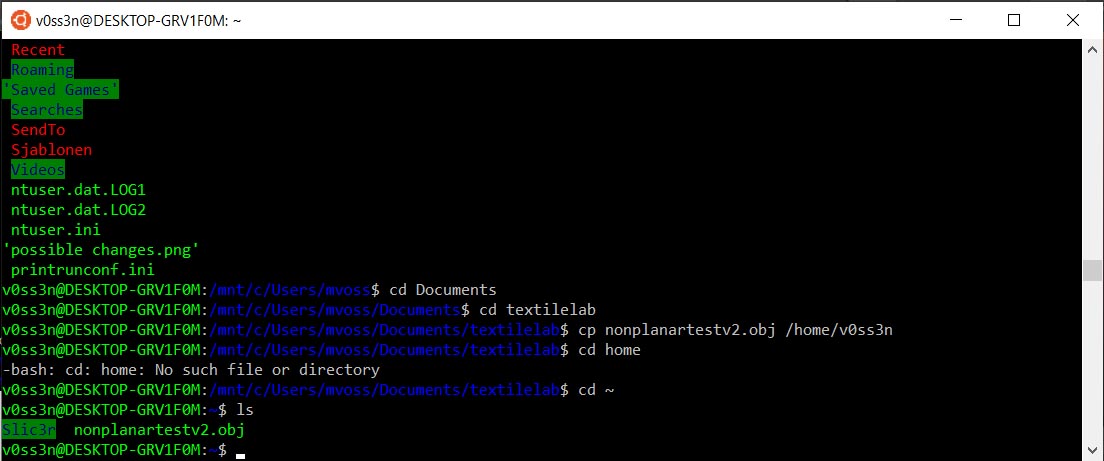
Something to keep in mind is that you cannot just open files located on Windows in the subsystem, but you can move them using Bash into Ubuntu. You can access your Windows directory via /mnt/c/ (Windows Sub-System for Linux provides you access to the Windows 10 system drive by mounting the C:\ . On Linux if you go to you root directory and list all directories, then you will notice a /mnt/c/ which is Windows 10 C:\ mounted on Linux. source)
Fan duct replacement
I will be using the Tevo Tarantula. I wanted to use the Prusa MK3S but the nozzle is completely surrounded by parts so modifying the Tevo will be easier. I found the following fan duct that I hope will not cause any collisions with my nonplanar print.
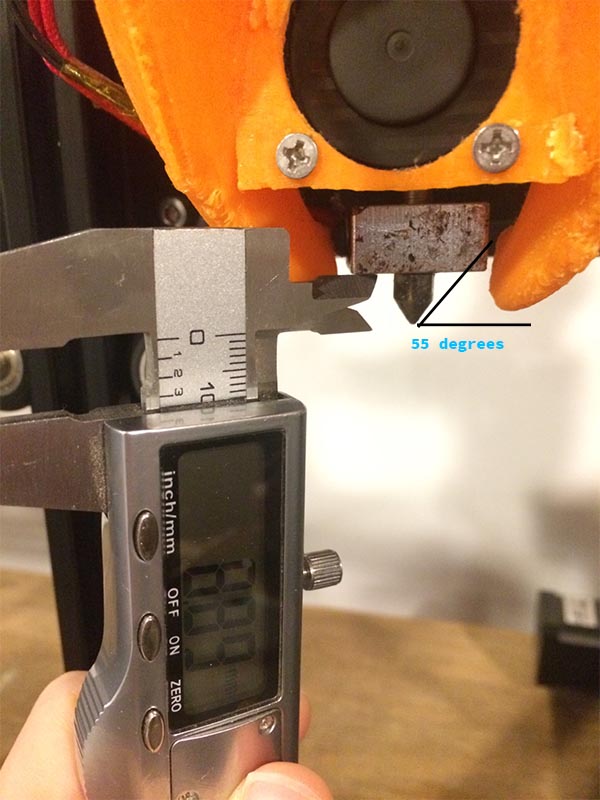 Measured max. height (height of nozzle): 8.89mm
Measured max. angle: 55 degrees
Measured max. height (height of nozzle): 8.89mm
Measured max. angle: 55 degrees
Result:
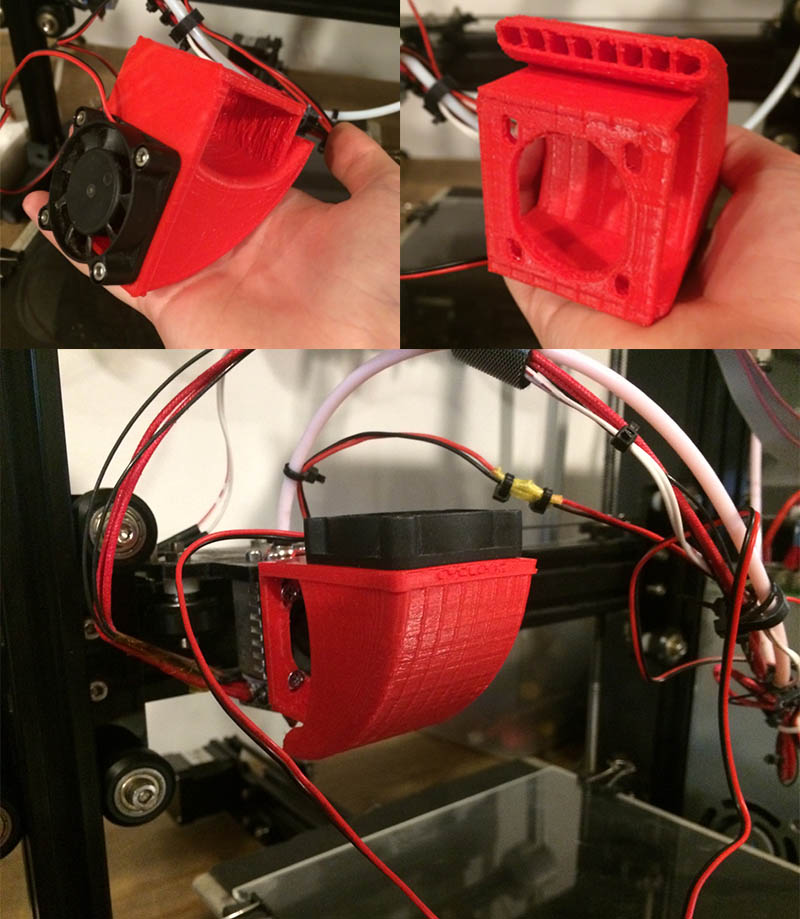
Note: I did have to sand the holes for the 30mm fan as they were too far apart.
Slic3r
Preparing the testfile I used Fusion360 and 3D Builder (I also used the Image 2 Surface add-in but that gave me a hollow body that I could not use so I used 3D Builder instead). However my file did not work with nonplanar slicing so I used a standard testfile from thingiverse. This may have to do with a bug in the software (https://github.com/Zip-o-mat/Slic3r/issues/4) creating false positive collisions.
Zip-o-mat commented on 16 Sep There should be no limits but at the moment the collision detection is rather sensitive and has many false positive collisions. I am working on the next version with better collision detection in nonplanar toolpaths.
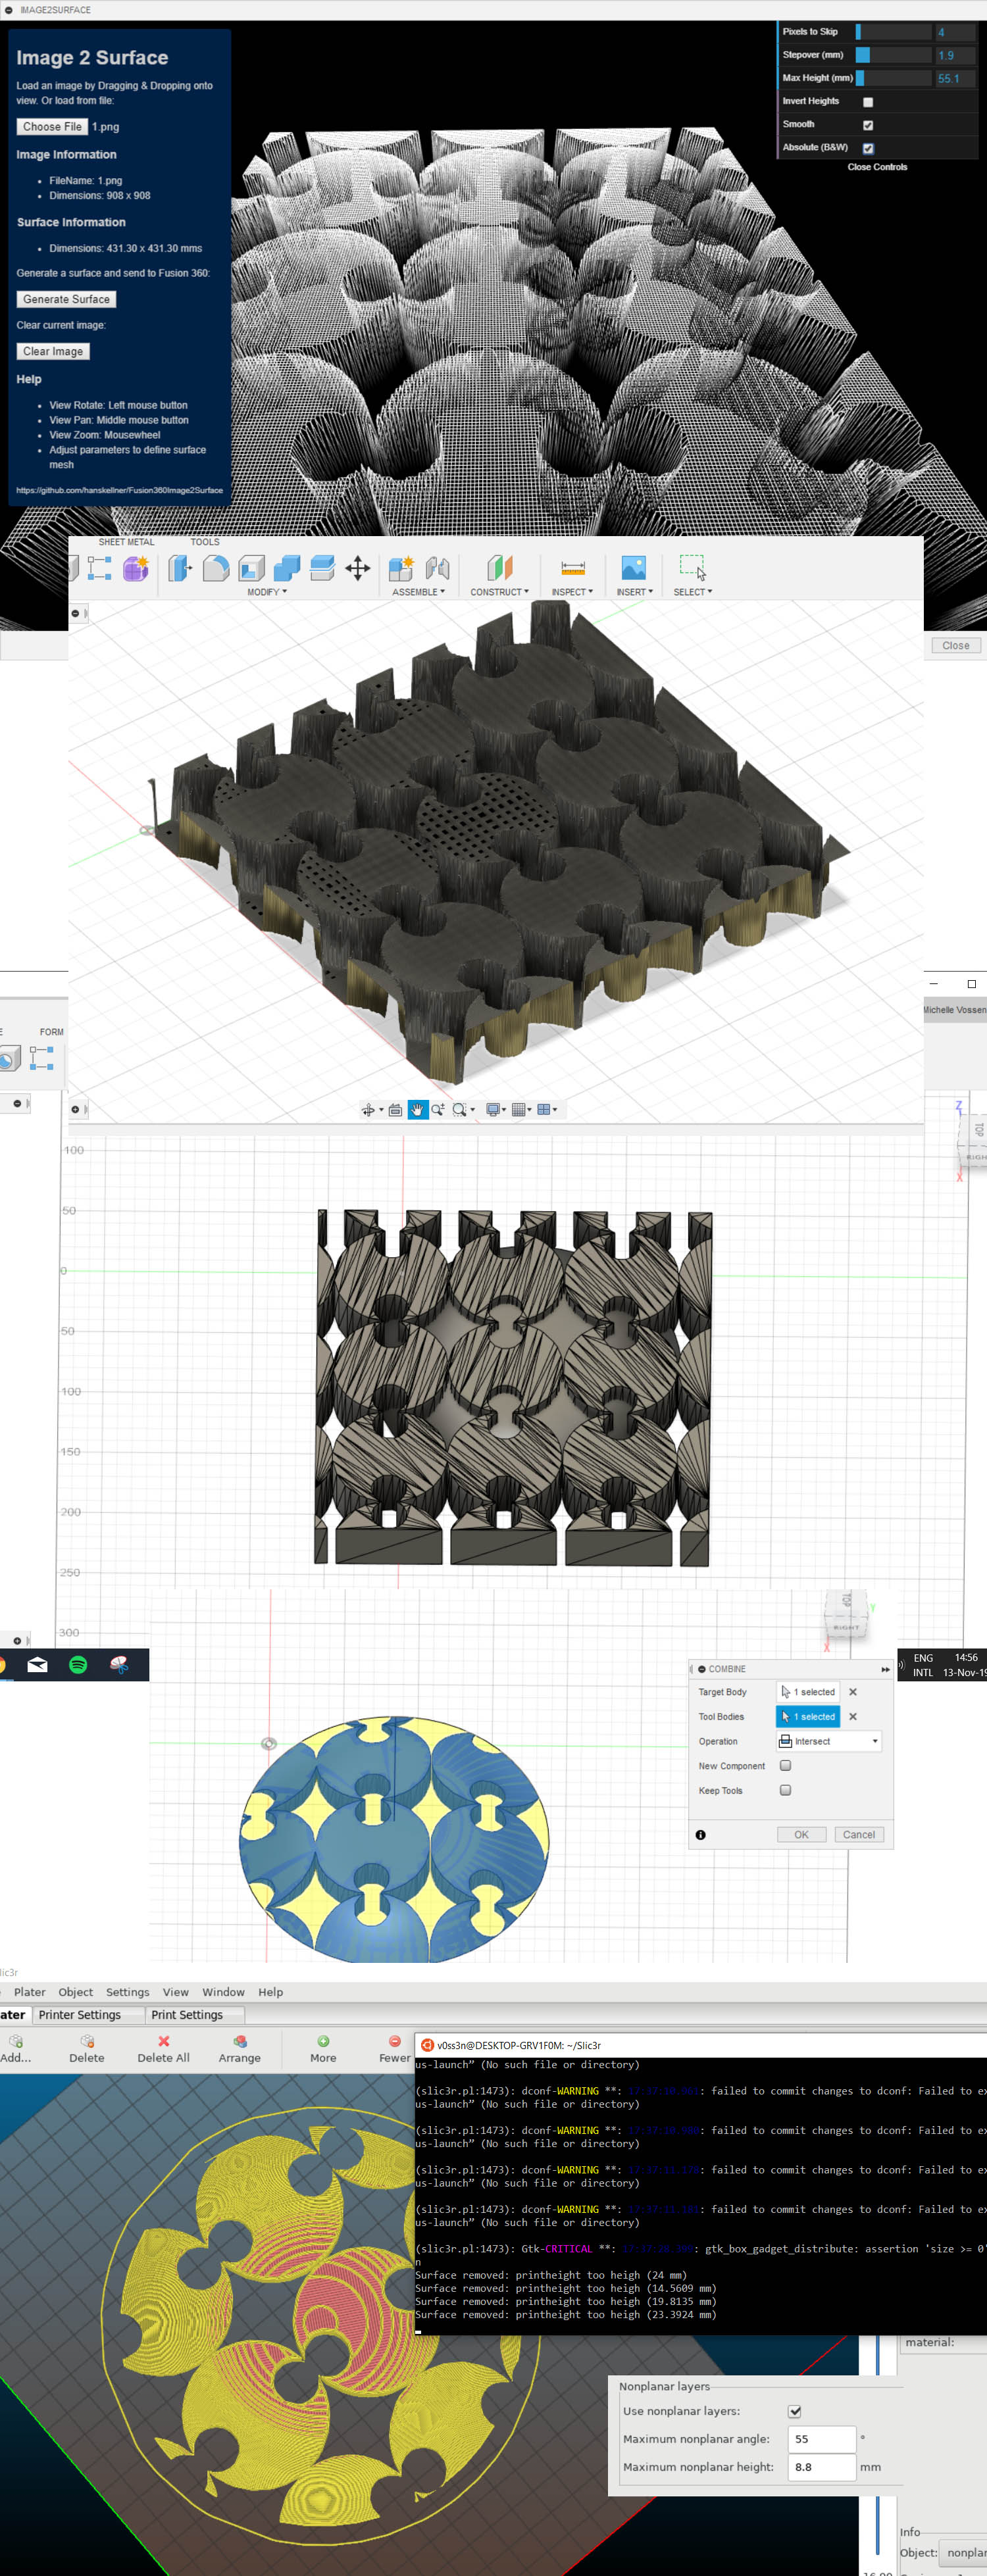
I wondered why the planar test I got from thingiverse worked, but everything I tried would not generate nonplanar layers. Then I realized that the top surface of the model is quite flat while all of my tests had much more convex outer shapes. I then played around with the cut tool in Slic3r (keeping the bottom part) and that seemed to do the trick. I hope that in future releases it will be possible to use convex shapes but for now I think it’s good to keep this in mind.
This is the nonplanar test from thingiverse:
Result
