Modeling a box (Fusion360)
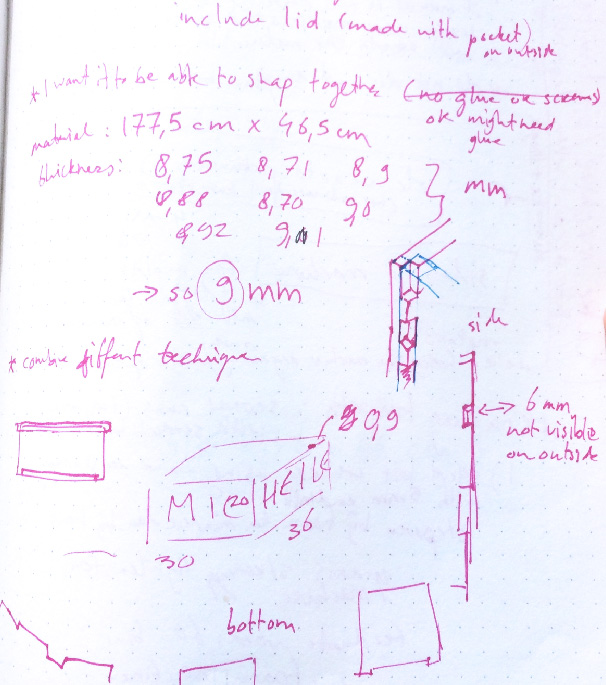
Since my 3D printing samples on fabric were laying around everywhere, I wanted to make a box with a lid for them. This box was designed keeping the restrictions of a CNC milling machine in mind.
Process
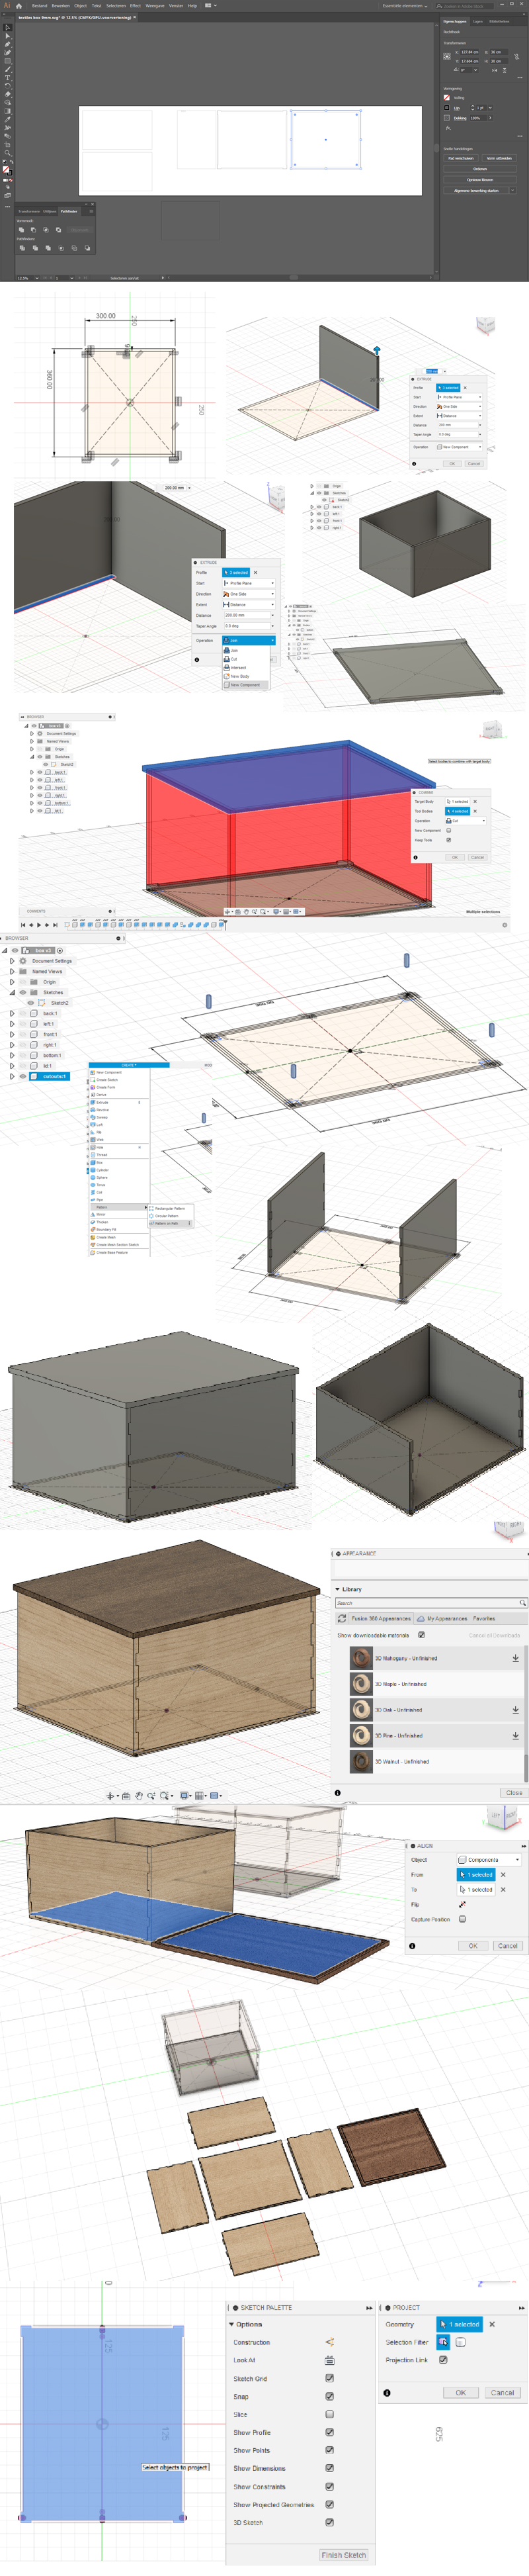
I first started to design the box in Illustrator, but I quickly realized that this required a lot of imagining what the box would look like. I switched to Fusion360 so I could actually see in 3D what I was doing. Since I didn’t have a lot of experience with Fusion360 and didn’t know where to start, I followed this tutorial (this is part one of four). You can skip the third and fourth video if you don’t need any rendering and just need to the plans for the CNC machine.
To make a CAM layout I tired using the align tool recommended in this tutorial. However, exporting the file as a dxf gave me a lot of issues so after that I projected all parts onto separate sketches.
Tips:
- Create variables from the beginning. I did not do that but halway through modeling I started to regret that. Then you can let the software calculate all of your distances instead of having to do it yourself.
- Think about the paths you have to mill, VCarve Pro does not allow you to select separate paths so your vectors will have to be the path you want. I had to add extra outline paths because the paths I created in Fusion would have otherwise cut off my notches.
Below my process of modeling the box.
Tutorial links
- Part 1: Modeling the box, bottom, and lid. Covers rabbets, grooves and miters.
- Part 2: Adding splines to reinforce the miters, modeling the thumb grip, and making the lid open and close using joints in Fusion.
- Part 3 : Applying wood materials, selecting the best grain, and photorealistic rendering.
- Part 4: Creating printable plans from the model.