e-Textiles
Liza Stark
During this week students will be introduced to an overview of the field of electronic textiles, example works in the field as well as materials and technical developments that have made these projects possible. We will go into details on different techniques for making soft/flexible/fabric circuits.
https://class.textile-academy.org/classes/week05/
Workshop notes
- Static energy: 2 objects with different electric charges > is limited in space (for example balloon and hair)
- Dynamic energy: electrons move continuously > a physical path => a current

- 1 Ampère = 6.241 * 10^18 electrons per second = 1 Coulomb per second (1 mA = 0.001 A)
- Power supply gives push to the electrons to move
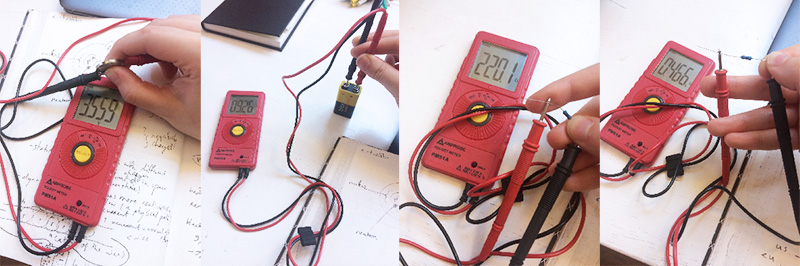
- Capacity to move charge is Voltage (V) > check voltage and + and - with multimeter (or lick the battery to see if it’s charged)
- You measure the difference in energy between two points
Best practice:
- red probe = + (V)
- black probe = - (COM)
Measuring voltages and resistance using a multimeter:
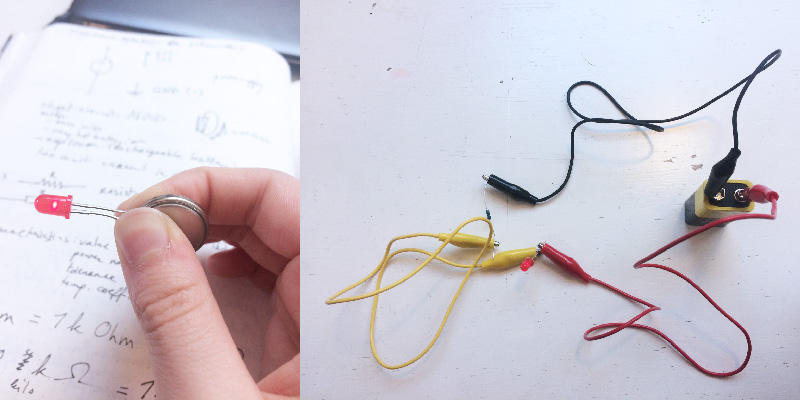
An LED has a cathode (-) and an anode (+). The short leg is the negative side, the long leg the positive. The optimal voltage for an LED is 3V (otherwise a risk of burning the LED), so when using a battery with a higher voltage you need to make use of resistors.
- When using a 9V battery, you need a resistor of 470 Ohm.
- When using a 5V battery, you need a resistor of 220 Ohm.
- When using a 3V battery, you don’t need a resistor.
Lighting up an LED with a battery:
A breadboard is used for quick prototyping. You use jumper wires to connect the components. Use the + and - strips for power supply (this is a convention, it’s clearer). Connecting a battery to a breadboard:
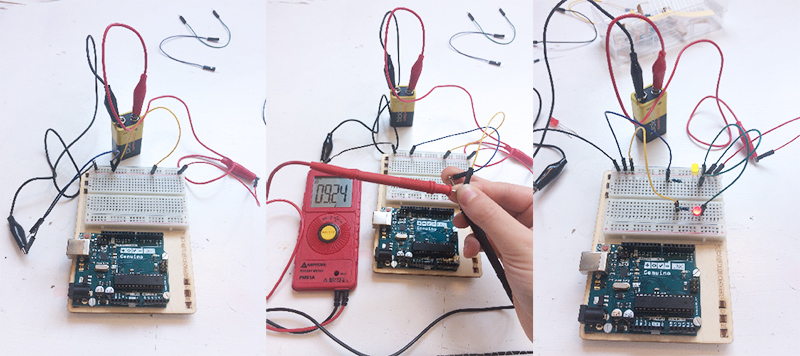
Arduino is an open source microcontroller that can be used to execute code. For example, to blink an LED:
A sensor is a device, module, machine, or subsystem whose purpose is to detect events or changes in its environment and send the information to other electronics, frequently a computer processor.
Digital sensors:
- on/off
- high/low voltage
- I/O
- GND/VCC (voltage change)
Analog sensors: all values between min. and max.; GND-VCC
Any switch can be used as a digital sensor (open/closed):
- Push (momentary)
- Toggle
- Tilt
- Stroke
An LDR (light dependent resistor; or photoresistor) is an analog sensor that decreases resistance with respect to receiving luminosity on the component’s sensitive surface. The resistance of an LDR decreases with increasing light intensity.
I used the following code (based on the built-in Blink example code) to let the LED blink when a button (push switch) is pressed:
int digital_sensor_pin = 7;     // where the sensor is connected
int digital_sensor_value = 0;
int led_pin = 3; // where the LED is connected

void setup() {
  pinMode(digital_sensor_pin, INPUT);
  Serial.begin(9600);
  // initialize digital pin LED_BUILTIN as an output.
  pinMode(led_pin, OUTPUT);
}

void loop() {
  digital_sensor_value = digitalRead(digital_sensor_pin);
  if(digital_sensor_value == HIGH){
      digitalWrite(led_pin, HIGH);
  } else {
      digitalWrite(led_pin, HIGH);   // turn the LED on (HIGH is the voltage level)
      delay(500);                       // wait for a second
      digitalWrite(led_pin, LOW);    // turn the LED off by making the voltage LOW
      delay(500);                       // wait for a second
  }
}
For more examples and tutorials check out kobakant.
Digital sensor
I made a soft digital sensor that I integrated into an experimental design tool.
Testing conductive yarn and conductive fabric with an LED:
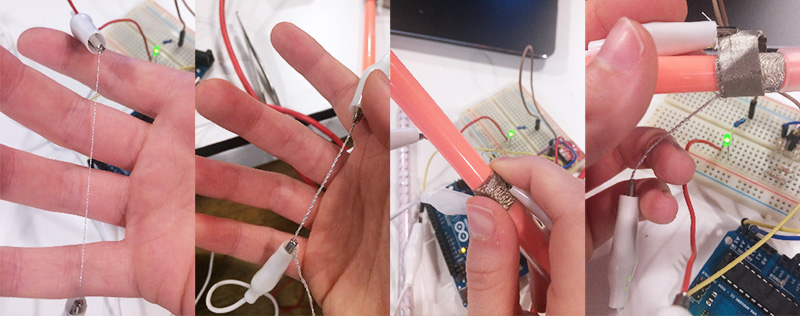
Final soft digital sensor, an on/off slide switch for an LED attached to a marker: